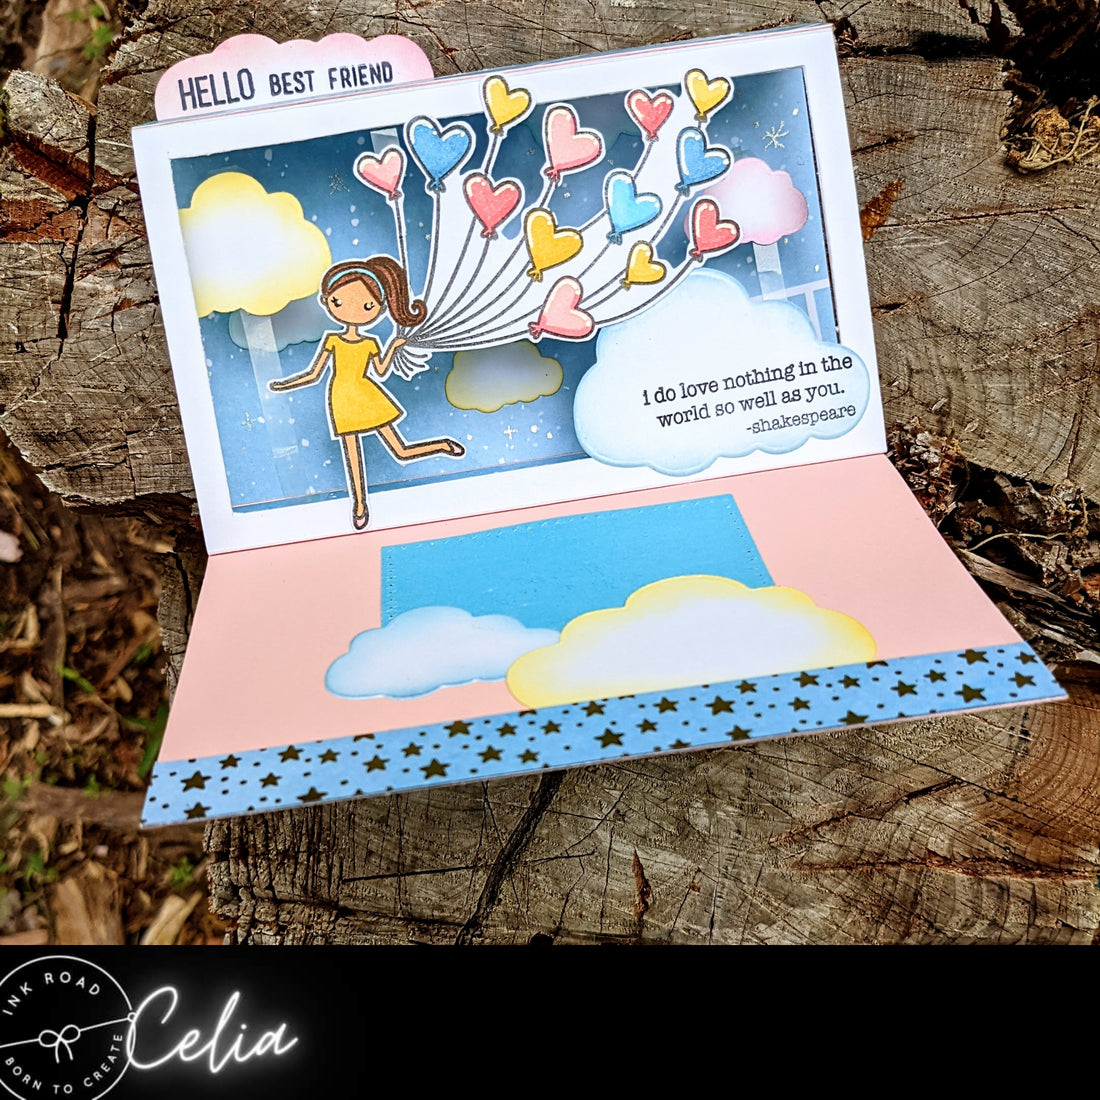
Inked Girl Kelly Shadowbox Card
Share
Hey there Roadies!
It's Celia from Paper Beats Rock Designs here to show you guys how I created this super fun Shadowbox Card using Inked Girl Kelly.

First I started with an A2 card and a 5.25x5.5 piece of cardstock.

I scored the card again an inch from the edge and the cardstock an inch in on both sides.

Then I grabbed my razor knife and score board and cut at .25 from the sides and scored lines to create a window.


I found the window to be a bit flimsy, so I cut .25 inch stripes and glued them around the inside of the frame to reinforce the window.

After that, I adhered the window to the inside of the card. I lined the bottom flap up with the inner score mark of the card and the top with the front panel's score mark.

I like to use liquid glue for this so you have a chance to get the panels positioned just right.


It's loads easier if you go slow and only glue one panel at a time, too.

Voila! With the base of the card done, it's time to decorate it! If you don't have a stamp block big enough for a stamp, you can do like I did and use a manual diecutting machine plate 🤭. I stamped out Kelly and her balloons and colored her up with alcohol markers.

I ended up cutting 2 panels from a spacey blue paper to 4.25x5.5 and then cutting an inch off each - keeping both pieces! Then I diecut a bunch of clouds from white cardstock and inked their edges with coordinating Distress Oxides.

Kelly wasn't going to fit with all her balloons so I held he to the front of the card to see which ones I should snip off. I saved them as well. Afterward, I used a white gel pen to cover the unneeded strings and add shine to the balloons. When that was dry I went over the white on the balloons and Kelly's eyes with a sparkly gel pen.

Afterwards, I adhered her to the outside of the window as well as one of the split blue panel to the inside of the window. I also stamped my sentiment on one of the clouds and attached it to the outside of the window as well. Then I made a few pop up legs from clear sticker backing (acetate) and used red line tape to adhere them to the inside of the window; scoring then at .25in for each of the feet and just eyeballing how tall they should be.

Then I decorated the front of the card with the second split blue panel, more clouds,and the balloons I cut off earlier. I inked the backside of the big blue cloud pink, and used "Boo Crew" and "Basics: Sentiment Strips" to create the greeting "Hello Best Friend".

I made sure to not glue anything across the front panel's score mark so it can pop up. To finish off the card, I decorated the inside of the card with a boarder strip, a few more clouds and a diecut stitched rectangle to write on.

I am on love with how the whole thing came out, with Kelly floating in to spread some love, even though it is a bit bulky.

I hope this inspired you to create your own project with Kelly or any of the of fun Inked Girls in the Inked Road Shop!